- 1-888-927-3423 TOLL FREE: USA/Canada
- Contact
Shop our complete inventory of rinks, components & accessories
Packing Snow
The Traditional Method of making ice for your outdoor rink is the oldest method and is done by packing snow and then spraying it with water.
This is still a very efficient approach as long as you get snowfalls early enough in your area and as long as you are building your rink in an area that has really cold winters. If you don't have really cold temperatures it will be difficult to maintain your rink.
You will skip this step if you are using the Liner Method or if you have not chosen to make a rink using the Traditional Method.
You'll get the best results if you can pack snow that is just below melting point. Snow near melting point becomes moist and compactable. It compacts with very little effort. Trying to compact powdered snow at very low (cold) temperatures is extremely difficult since the snow will not easily stick to itself, so take advantage of the first few sticky snow falls in November or December!
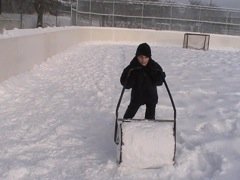
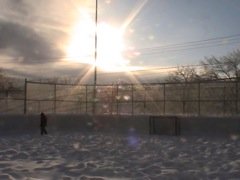
I start by getting my children, the neighbors (children and adults) to walk, run and stomp around on the snow.
We do a lot of stomping! It's a great way for everyone to keep in shape!

I then continue by packing snow against the boards in order to make a
border. I pack more snow on the inside perimeter of the boards and make
sure that once compacted the snow level in this area is higher than the
rest of the surface.
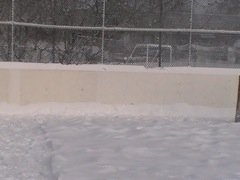
A higher border will help contain the water and helps in producing desired ice depth quickly. When I flood, resurface or freezing rain falls, the borders will retain the water on my ice sheet.
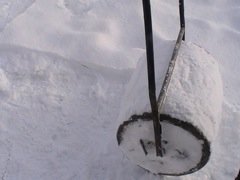
Next, I use a lawn roller to pack the rest of the snow on the rink. I fully fill the roller with water, so it weighs almost 250 pounds. A nice trick is to wrap the roller part with duct tape all around. This helps prevent snow from sticking to the metal and the roller keeps its cylindrical shape. You could rent or buy the lawn roller. It is not expensive.
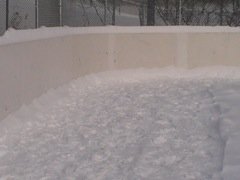
On your first round, you will pack the snow tightly throughout your entire ice rink surface and then you will spray and let the snow freeze as much as possible. You then need to observe your ice rink surface and pack more snow onto the low areas of your rink and then re-spray and let it freeze once again. Repeat the process until you get a solid 3" to 5" ice base. Don't forget to build up your borders at the same time to prepare for flooding.
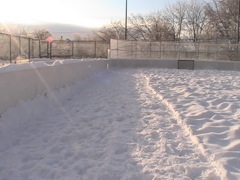
I found that it becomes much easier if you keep packing snow until the ice depth is 3" to 5" thick.
Packing snow is definitely a lot of hard work but it is also very fun work. With a little patience and determination the work does get done.
For me, it is very pleasurable seeing the kids work together to get the job done and after a nice long sunny winter day working outside, you get a very rewarding feeling looking at the rink as the sun sets.
Free Periodical mybackyardicerink
Online Rink Magazine (E-zine)
Please subscribe to my online rink magazine, mybackyardicerink.
Keep up to date with the latest information on My Backyard Ice Rink!
Like mybackyardicerink.com?
New! Comments
+1 mybackyardicerink
Site
+1 mybackyardicerink
Site
Keep up to date with the latest information on My Backyard Ice Rink!
Sign up for my FREE newsletter: